How Audio Extraction Works (And Why Your Files Stay Private)
How browser-based audio extraction pulls sound from video files using FFmpeg WebAssembly, with no uploads and no server involvement.
What Is Audio Extraction?
Audio extraction is the process of pulling the sound track out of a video file and saving it as a standalone audio file. The video frames are discarded and only the audio data is kept.
This is useful in a lot of situations. You might want the audio from a lecture recording so you can listen on your commute. You might need the soundtrack from a video for a podcast or presentation. Or you might want to transcribe a meeting recording and the transcription tool only accepts audio files.
Whatever the reason, the question is how to do it without installing software and without uploading your files to someone else's server. Try the Audio Extractor to see how it works.
How Video Files Store Audio
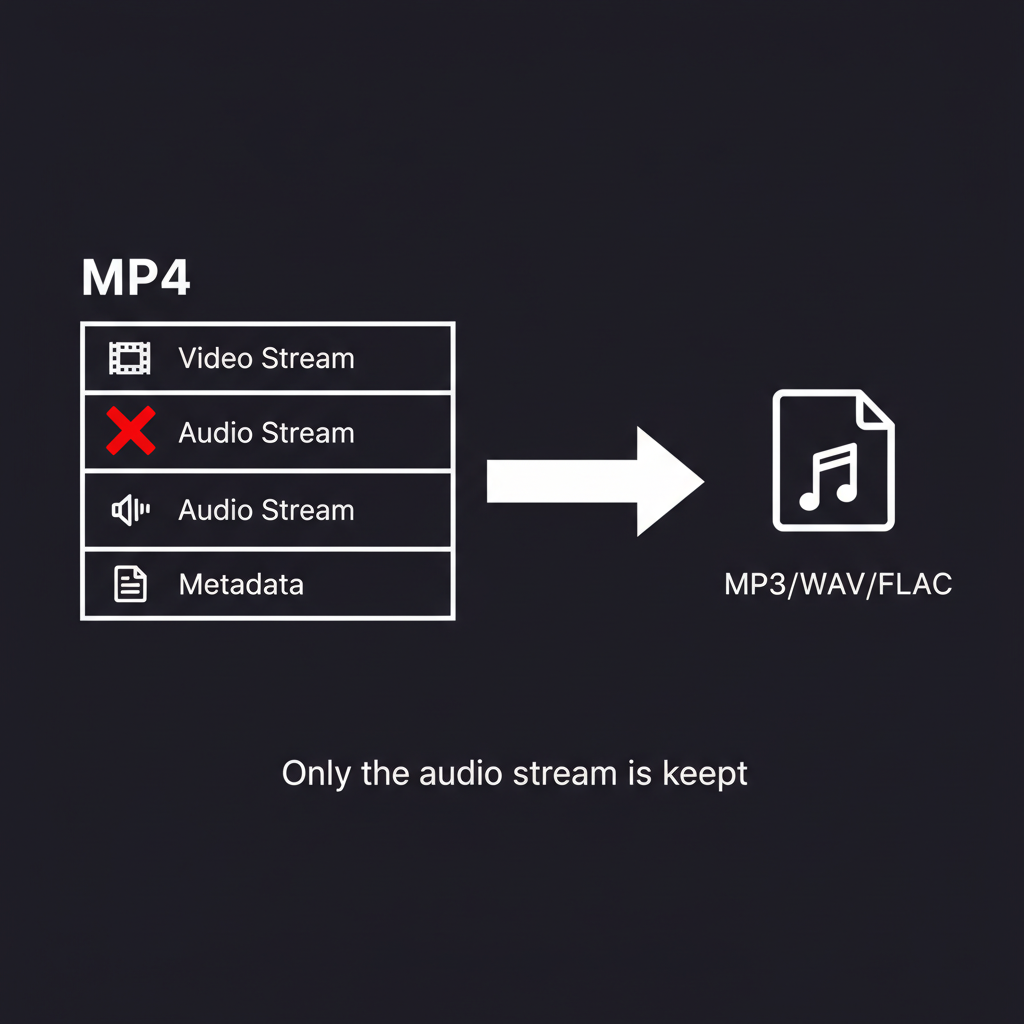
A video file is not a single stream of data. It is a container (like MP4, MKV, or WebM) that holds multiple streams bundled together:
- Video stream — the visual frames, encoded with a codec like H.264 or VP9
- Audio stream — the sound, encoded with a codec like AAC, MP3, or Opus
- Metadata — information like duration, resolution, creation date, and chapter markers
- Subtitle stream (optional) — text tracks for captions
When you play a video, your media player reads all these streams in sync. When you extract audio, the tool reads just the audio stream and writes it to a new file, ignoring everything else.
The Two Ways to Extract Audio
There are two fundamentally different approaches to extracting audio from a video, and they have different trade-offs.
Stream Copy (Lossless)
The fastest method is to copy the audio stream directly out of the container without decoding or re-encoding it. The audio data is transferred byte-for-byte from the video file into the output file. This is instant and produces zero quality loss because the original audio data is preserved exactly.
The limitation is that the output format must be compatible with the codec already used in the video. If the video contains AAC audio, you can stream-copy it into an M4A or AAC file, but you cannot stream-copy it into an MP3 file because MP3 uses a different codec.
Re-encoding (Transcoding)
The more flexible method is to decode the audio stream and then re-encode it into a different format. This lets you convert AAC audio to MP3, or extract audio as WAV or FLAC regardless of what codec the video uses.
The trade-off is that re-encoding lossy formats (like AAC to MP3) involves a generation of quality loss, since the audio is decoded and then compressed again. For lossless output (WAV or FLAC), the decoded audio is saved without any compression artifacts, so the quality matches the original.
Choosing an Output Format
The Audio Extractor supports five output formats. Each serves a different purpose.
MP3
The most widely supported audio format. Every device, app, and platform plays MP3 files. At 192 kbps or higher, the quality is good enough for most listening. At 128 kbps, it is fine for speech (podcasts, lectures, meetings). MP3 files are relatively small.
Best for: sharing, podcasts, mobile listening, general use.
WAV
Uncompressed audio. WAV files are large (roughly 10 MB per minute of stereo audio) but preserve the full decoded audio with zero compression. The audio quality is limited only by what was in the original video.
Best for: editing in a DAW, archiving, any workflow where you need uncompressed source material.
FLAC
Lossless compression. FLAC files are about 50-60% the size of WAV while preserving identical audio quality. Every sample is reconstructed perfectly when the file is played back. FLAC is widely supported on desktop and Android but has limited support on some older Apple devices.
Best for: archiving with smaller file sizes, music preservation, lossless distribution.
AAC
A lossy codec that generally sounds better than MP3 at the same bitrate, especially below 128 kbps. AAC is the default audio format for Apple devices, YouTube, and most streaming platforms.
Best for: Apple ecosystem, streaming, situations where you need smaller files than MP3 at the same perceived quality.
OGG (Vorbis)
An open-source lossy format with good quality at moderate bitrates. OGG is fully supported on Firefox, Chrome, and Android but has limited support on Apple devices and some older hardware.
Best for: open-source projects, web audio, situations where patent-free formats matter.
How It Works in Your Browser
Our audio extractor uses FFmpeg compiled to WebAssembly (FFmpeg.wasm). Here is what happens step by step when you extract audio:
-
You drop a video file onto the page. The file is read into your browser's memory (RAM). It is not uploaded anywhere.
-
FFmpeg.wasm loads. The WebAssembly module (about 30 MB) is downloaded once from a CDN and cached by your browser. On subsequent visits, it loads from cache.
-
You choose a format and quality. The tool configures the FFmpeg command based on your selection. For example, choosing MP3 at High quality runs something equivalent to
ffmpeg -i input.mp4 -vn -acodec libmp3lame -b:a 320k output.mp3. -
FFmpeg processes the file locally. The WebAssembly runtime executes the extraction entirely within your browser tab. Your CPU does the work. No network requests are made during processing.
-
The output file is created in memory. The extracted audio file exists in your browser's memory, ready for download.
-
You download the result. Clicking the download button saves the file from browser memory to your device's storage.
At no point does any audio or video data leave your computer. The entire pipeline runs locally.
How Privacy Is Preserved
The privacy model here is not based on a policy or a promise. It is a technical guarantee built into how the tool works.
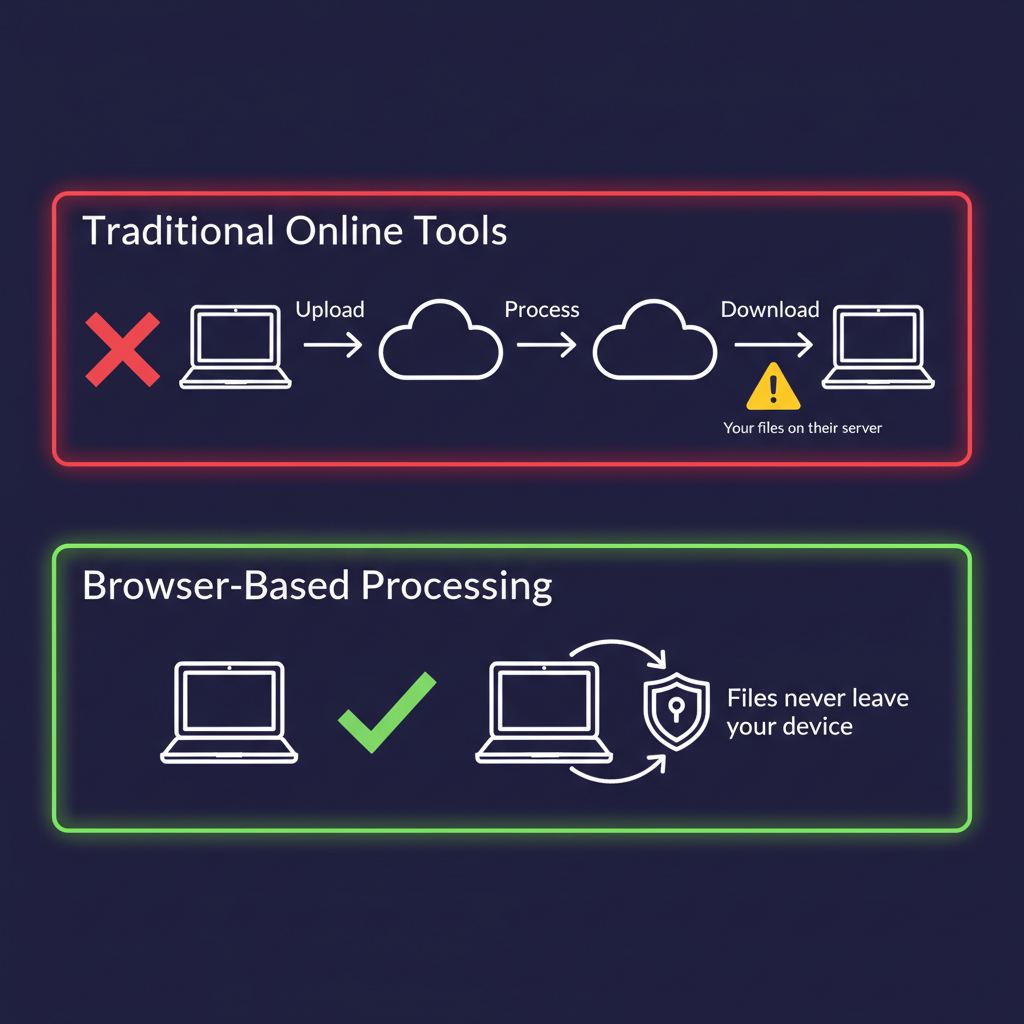
No Upload, No Server
Traditional audio extraction tools require you to upload your video to a remote server. The server decodes the audio, saves it, and lets you download the result. During that process, your video exists on someone else's infrastructure. Even if they promise to delete it, you have no way to verify that.
With browser-based extraction, there is no server in the processing pipeline. The website serves the HTML page and the WebAssembly module, but once those are loaded, your browser handles everything independently. You could disconnect from the internet after the page loads and the tool would still work.
No Account Required
You do not need to sign in, create an account, or provide any personal information to use the tool. There is no user profile, no usage history, and no way to tie a specific extraction to a specific person.
Memory Cleared on Tab Close
When you close the browser tab, all data in memory is released. The video file, the extracted audio, and any intermediate processing data are gone. There is no persistent storage, no temporary files on a remote server, and no way to recover the data afterward.
Verifiable
You do not have to take our word for it. Open your browser's developer tools (F12), switch to the Network tab, and watch while you extract audio. You will see the initial page load and the FFmpeg.wasm download, but during the actual extraction process, there are zero network requests. The processing is entirely local.
Step-by-Step Guide
Here is how to extract audio from a video:
Step 1: Open the Audio Extractor
Go to the Audio Extractor page.
Step 2: Load Your Video
Drag and drop a video file or click to browse. The tool supports MP4, MKV, WebM, AVI, MOV, WMV, FLV, 3GP, MPEG, OGV, and M4V.
Step 3: Choose Format and Quality
Select your output format (MP3, WAV, FLAC, AAC, or OGG). For lossy formats, choose a quality level:
- High — best sound quality, larger files (320 kbps for MP3)
- Medium — good balance for most uses (192 kbps for MP3)
- Low — smallest files, suitable for speech (128 kbps for MP3)
For WAV and FLAC, quality settings do not apply since these are lossless.
Step 4: Extract and Download
Click Extract Audio. The tool processes your file and presents the download button. The extraction typically takes a few seconds for a 5-minute video.
Extract audio from your video now — free, private, and instant.
Tips
- Choose WAV or FLAC if you plan to edit the audio later. Starting from a lossless source avoids stacking compression artifacts.
- Use MP3 at 128 kbps for speech recordings. Human speech does not need high bitrates, and the smaller file size makes sharing easier.
- Use FLAC instead of WAV for archiving. Same quality, roughly half the file size.
- If the video has no audio track, the tool will detect this and show an error. Some screen recordings and GIF-to-video conversions produce videos without audio.
Use in Your Language
The Audio Extractor is available in Español, Français, Deutsch, 日本語, 한국어, Русский, and 中文.
Other Tools
Looking for more? You can also split videos into clips, convert video formats, split audio files, or crop images — all free, browser-based, and private.