How to Split Video Online Without Uploading
Split videos into clips directly in your browser. No uploads, no servers, no account needed. Your files stay on your device the entire time.
Why Split a Video?
There are plenty of reasons you might need to cut a video into smaller pieces. Maybe the file is too large to send over email or WhatsApp. Maybe you recorded a long meeting and only need a few key moments. Maybe you want to post a clip on Instagram or TikTok but the original is 20 minutes long.
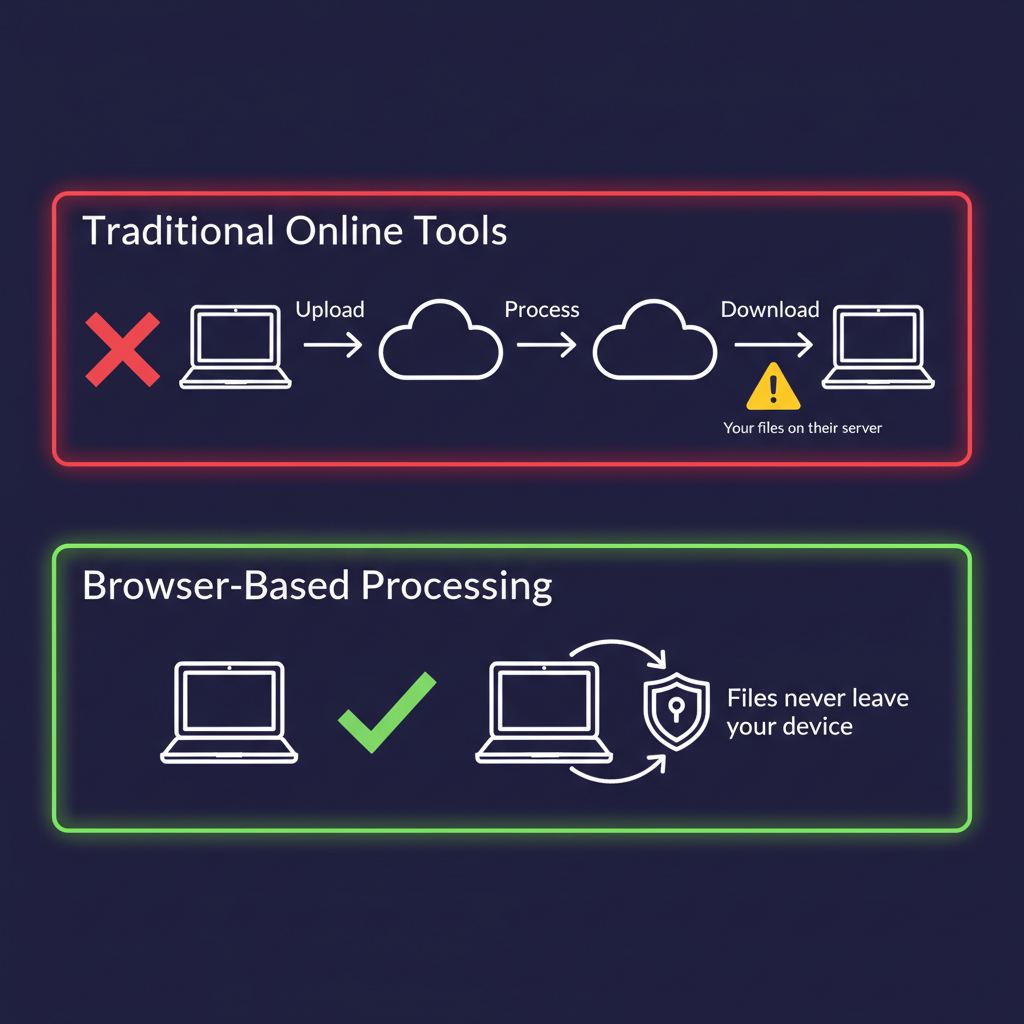
Whatever the reason, most online video splitters work the same way: you upload your file to a remote server, wait for it to process, then download the result. That means your video sits on someone else's computer, even if only temporarily. For personal footage, work recordings, or anything sensitive, that is a real concern.
There is a better way. Try the Video Splitter now and see for yourself.
Splitting Video in Your Browser
AI Toolbox's video splitter works entirely in your browser. When you drop a video file onto the tool, it does not get sent anywhere. The file stays in your browser's memory, and all the processing happens on your own device using a technology called WebAssembly.
Under the hood, the tool runs FFmpeg, the same open-source video processor used by professional editors and streaming platforms like YouTube. The difference is that FFmpeg has been compiled into a format that browsers can execute directly. This means you get professional-grade splitting without installing any software or creating any account.
Step-by-Step Guide
Here is how to split a video using the tool:
Step 1: Open the Video Splitter
Go to the Video Splitter page. You will see a drop zone where you can add your video.
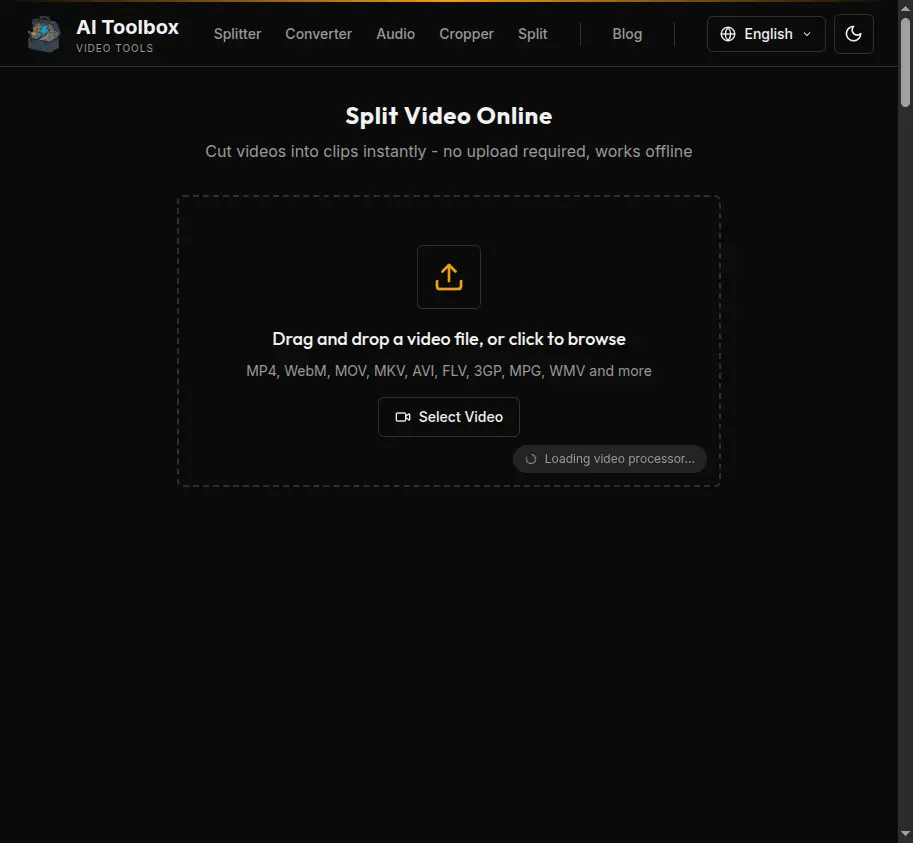
Step 2: Load Your Video
Drag and drop your video file, or click to browse your files. The tool supports MP4, WebM, MOV, MKV, AVI, and many other formats. Once loaded, you will see a video preview and a colorful timeline showing the waveform of your video.
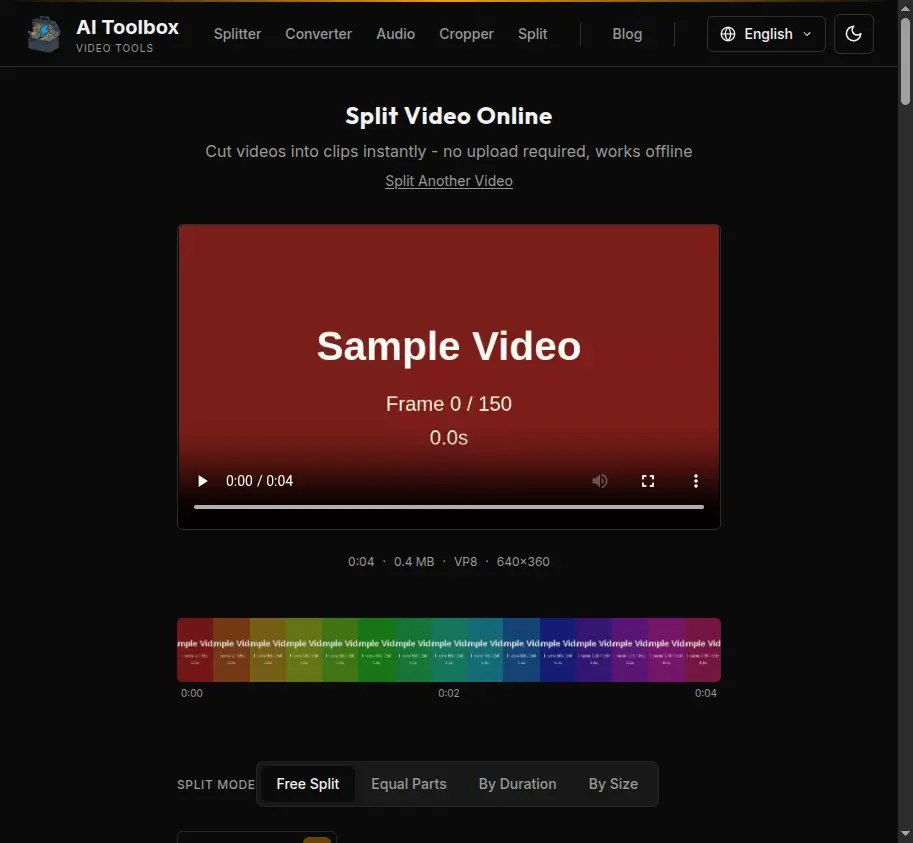
Step 3: Choose a Split Mode
There are four ways to split your video:
Free Split is the most flexible option. Click anywhere on the timeline to place a split point. You can add as many points as you want, drag them to adjust, or type exact timestamps. This is ideal when you know exactly which moments you want to cut.
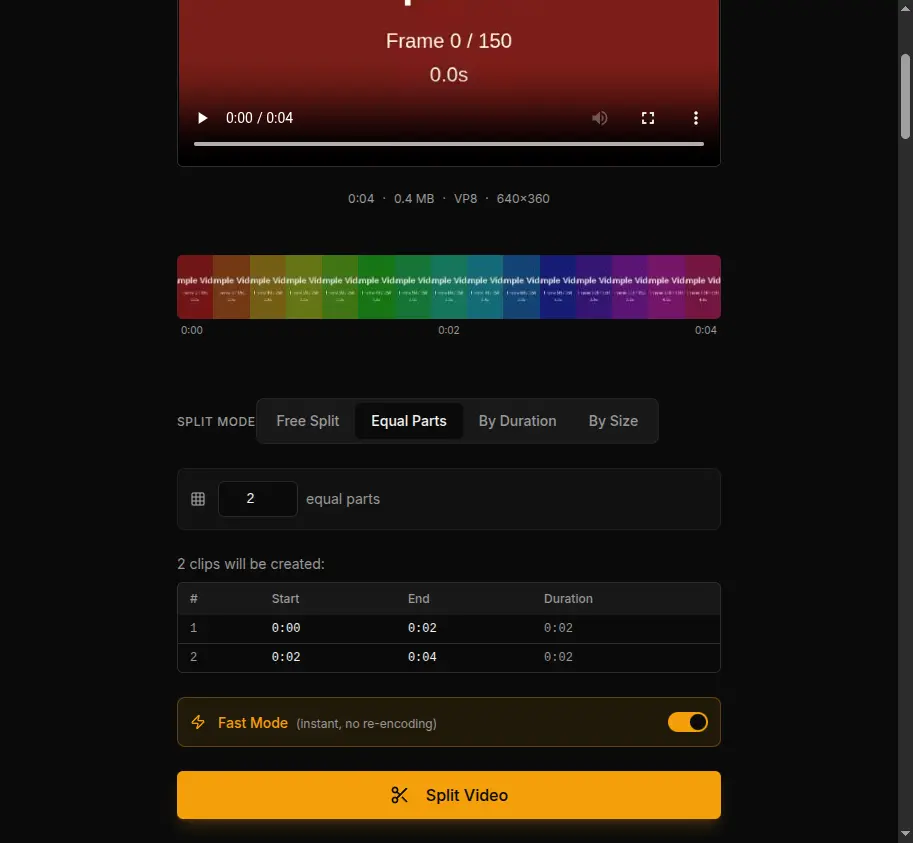
Equal Parts divides the video into a set number of segments. Choose how many parts you want and the tool calculates the split points automatically. This works well for breaking a long recording into chapters of equal length.
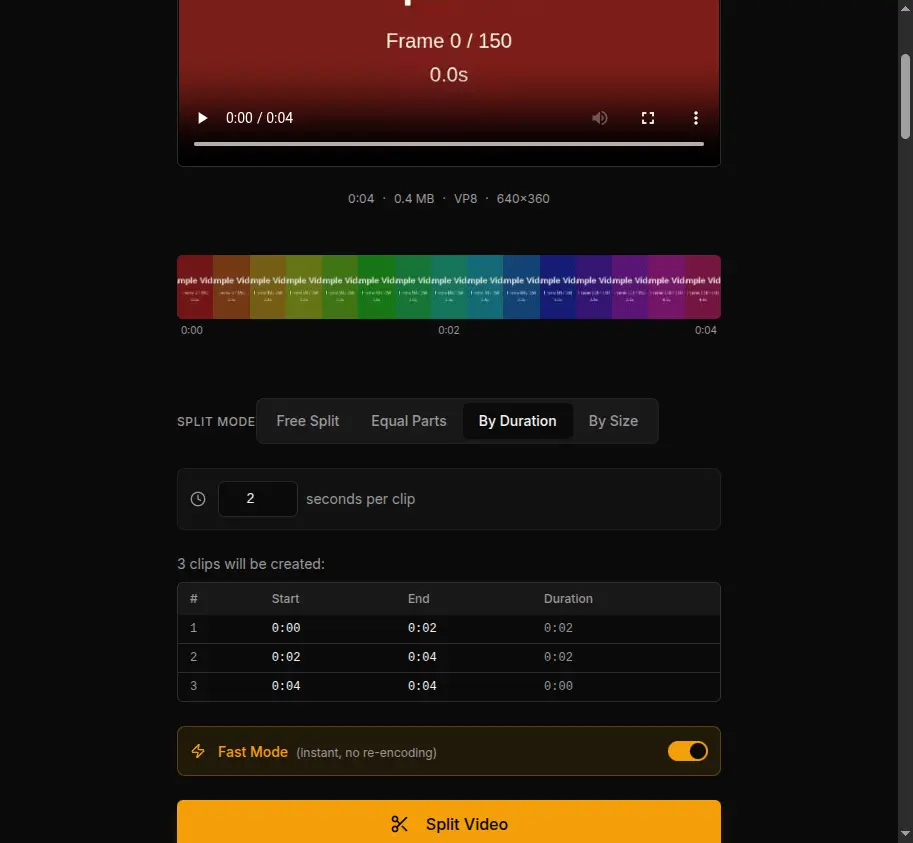
By Duration splits the video into segments of a fixed time length. Set it to 30 seconds and every clip will be 30 seconds long (the last one may be shorter if there is leftover footage). Useful for creating a batch of short clips from a longer video.
By Size lets you specify a target file size per clip, like 25 MB. The tool estimates where to cut based on the video's bitrate so each clip stays under your target. This is handy when you need to share files through services with upload limits.
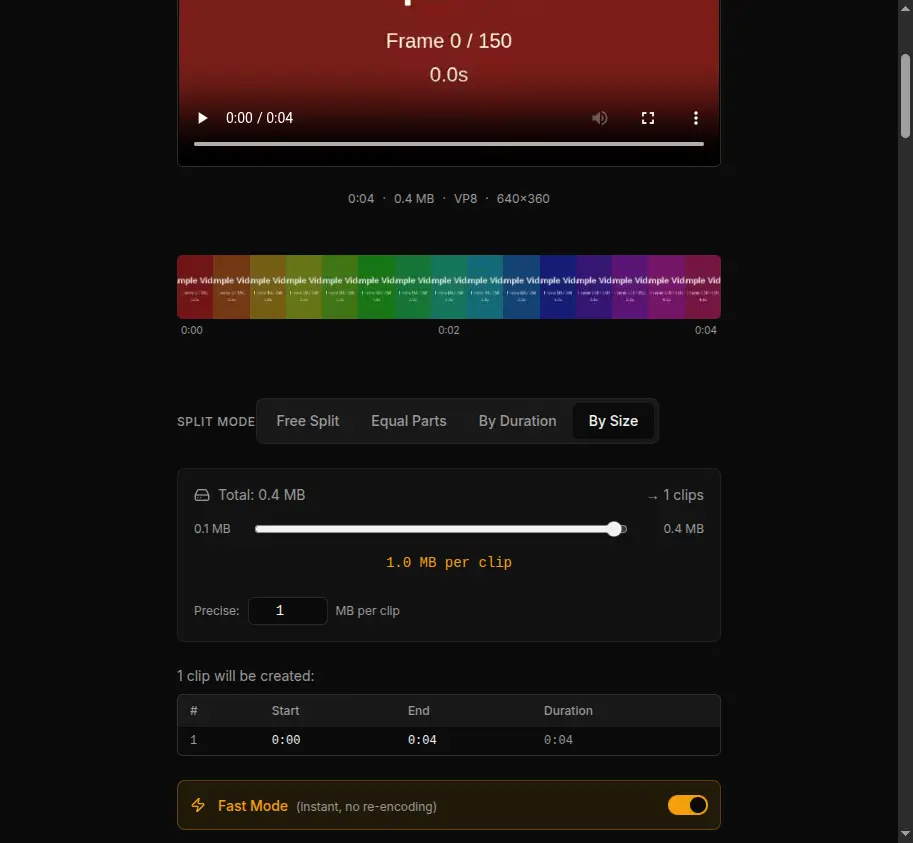
Step 4: Choose Fast Mode or Re-encoding
This is an important choice that affects both speed and precision.
Fast Mode is on by default. It splits the video almost instantly because it copies the original video data without re-processing it. The tradeoff is that cuts land on the nearest keyframe rather than the exact frame you selected. In practice, this means cuts might be off by a second or two.
Keyframes (also called I-frames) are reference frames that the video codec places at regular intervals, typically every 1 to 2 seconds. Because Fast Mode copies data directly, it can only cut at these reference points.
Re-encoding mode (Fast Mode off) processes every frame, so cuts land exactly where you placed them. You can also change the output format (MP4, WebM, MKV, etc.) and set quality to High, Medium, or Low. The tradeoff is that re-encoding takes longer, usually 30 to 90 seconds per 5-minute clip on a modern laptop.
For most quick splitting tasks, Fast Mode is the right choice. Use re-encoding when you need frame-perfect timing or want to convert the format.
Step 5: Split and Download
Click the Split Video button. The tool processes your clips and shows them in a list. You can download each clip individually or grab them all at once.
Ready to try it? Open the Video Splitter and drop your first file.
How Privacy Is Preserved
This is not just a marketing claim. The privacy guarantee comes from how the technology works, not from a policy document.
Nothing Leaves Your Device
When you load a video into the splitter, the file goes into your browser's memory (RAM). FFmpeg WebAssembly then reads and processes it locally. The resulting clips are also created in memory. At no point does any video data travel over the network.
You can verify this yourself: open your browser's developer tools (F12), go to the Network tab, and watch while you split a video. You will not see any file uploads.
No Server Involvement
Traditional online tools need servers because browsers historically could not handle heavy processing. WebAssembly changed that. By running FFmpeg directly in the browser, there is no server in the loop. The AI Toolbox website serves the page and the WebAssembly module, but once those are loaded, your browser does all the work independently.
No Account, No Tracking of Files
You do not need to sign in or create an account to use the video splitter. There is no user profile tied to your files. The tool does not log what you process, how large your files are, or what formats you use.
Data Cleared on Tab Close
Once you close the browser tab, all video data in memory is released. There is no cache, no temporary file on a server, and no way to recover the video after the tab is closed. This is a fundamental property of how browsers manage memory for web applications.
Why This Matters
For personal videos, home recordings, work presentations, or anything you would not want on someone else's server, local processing is the only approach that offers a genuine privacy guarantee. Server-based tools can promise to delete your files after processing, but you have no way to verify that. With browser-based processing, the question does not arise because the data never leaves in the first place.
Tips for Best Results
- Use Fast Mode for large files. A 2 GB video can be split in seconds with Fast Mode. Re-encoding the same file could take several minutes.
- Use Chrome or Edge for best performance. Chromium-based browsers have the strongest WebAssembly support and handle large files more reliably than Firefox or Safari.
- Close other tabs if splitting large files. Video processing uses your device's RAM. Freeing up memory by closing unused tabs can help with very large files.
- Try a test split first. If you are not sure whether Fast Mode or re-encoding is better for your use case, split a short test clip first to check the output before committing to the full video.
Summary
Splitting video does not have to mean uploading your files to a stranger's server. Browser-based tools powered by WebAssembly let you do the same job locally, with no installation, no account, and no privacy compromise. Your video stays on your device from start to finish.
Split your video now — it is free, private, and takes seconds.
Use in Your Language
The Video Splitter is available in Español, Français, Deutsch, 日本語, 한국어, Русский, and 中文.
Other Tools
Looking for more? You can also convert video formats, extract audio from video, split audio files, or crop images — all free and browser-based.